Sunday, March 17, 2013

Camellia

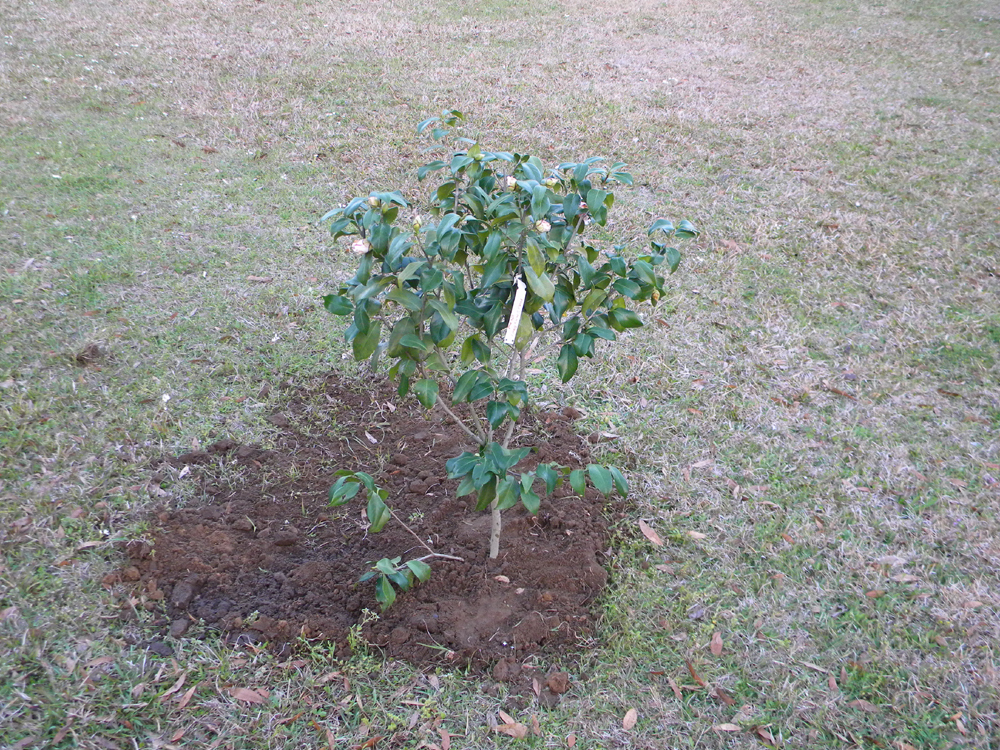
Once more, I find myself not updating my blog as much as I'd like, or should. It's been a month, I think, since my last update. Last time, I had mixed up the soil in my raised garden bed with some natural fertilizer (cow manure), had talked about putting out the squirrel repellent, and discussed my amaryllis and my strawberry plant. Time for some updates! But, first things first. I entitled this blog entry "Camellia", because that's what I ended up getting for my yard today. My friend and I went to Menge flea market in Pass Christian this morning, just for something exciting to do, and while there, I came across a lovely camellia tree/bush in a 3 gallon pot that I fell in love with. It was $20, and had a gorgeous bloom on it, white with pink stripes.
I balked at the $20 price tag, and decided to consider it. We walked around the rest of the flea market, then we went back to the beginning part of it to for him to purchase a pink angel trumpet bush that he wanted to put into a large concrete container. Then, we headed back to the booth that had the camellia, and I looked at it again, checking it out to make sure there was nothing wrong with it, that it was healthy, etc. etc. I then asked the guy running the booth if he would let it go for $15. He told me the plants were not his, that he was just helping to sell them, but that I could have it for $18. I pulled out $15, and my friend dug in his pockets and came up with $2 in ones; I held it out to the guy and told him $17 was all I had. He looked at the money for a moment, then said ok and took it. I then proudly carried my new camellia to my truck. Shortly after getting home, I then searched my front yard (I was determined it was to go in the front yard) for the perfect spot, then decided on an area near the property line to the south of my house, just in front of where the porch would be if it extended that far, and then dug the hole and planted it.


I made sure it had plenty of space for growing, and will be beautiful in that spot when it's gotten much larger. It also is in a spot where I can view it upon stepping out onto my porch without having to crane my neck too far to the right. :) I wasn't entirely sure of the variety; the label on the plant just says "Mrs Jimmy Davis Striped":
So, of course I had to Google it. :) And I found that this variety originated in 1961, in Hammond, Louisiana, by Walter F. Wilson, Jr., comes in both pink and white/pink striped, and that it has vigorous, open, and upright growth. Sounds good to me! I can't wait until it's a good six feet or taller and producing dozens of gorgeous blooms!

Now, as to the squirrel repellent, I've used the stuff a couple of times now, and while the squirrels are still here, they don't seem quite as nuisancy or stay in the yard as often as they used to. However, I don't know that the Shake-Away stuff, by itself, is going to solve my innumerable squirrel issues. I think I'm going to have to combine it with live trapping to move the squirrels away (either that, or buy a BB gun and start practicing shots on them up in the trees). There are more squirrel nests than I can count in all the trees in the backyard. They are going to have to be taken care of so I can have my chicken coops too, since the squirrels will eat all the chicken feed if I'm not careful. Moving on, in the last blog, I had posted that I had just planted my pink amaryllis in a pot to get it started while the weather was still unpredictable. Well, that little thing has finally started growing!


It's been rather vigorous over the last five days. On Monday, I plucked what I thought was a weed growing in the pot, about 2-3 inches from the bulb, and then was horrified to think that might have been the plant, growing from the bottom of the bulb or something (I have little to no experience with bulb plants at this point lol). I was assured by my friend that wasn't the case, and since Monday, the plant has gone from a very tiny green start on the top of the bulb to the size in the pictures above. And the bud is shaping up to give me what I hope will be a huge bloom! Speaking of blooms, my strawberry plant has 3 blooms on it! I'm guessing it actually prefers the cooler weather to the heat of the summer that I subjected it to last year, so who knows, maybe I will get some nice berries this time around!

And, as it turns out, the strawberry isn't the only thing blooming around here! My purple verbena has just gone to town with blooms this year! It's nearly taken over the flower bed it occupies, which is fine; when the yellow lantana starts growing again (assuming it does), it'll be intermixed with the verbena, to give a very nice purple and yellow/gold show! One would think I'm an LSU fan lol!

Of course, my camera didn't capture the true dark purple of the blooms. It comes close in the top picture, but the blooms pictured on the bottom are a very, very pale version of the true color. In that same bed, I also have lemon thyme which, while of course not blooming, is doing very well in it's third year of growth:
On the other side of the steps, my coral bells azalea has been producing some blooms, although the frost killed off some of the blooms earlier this past week. And then, there is my rosebush, which I pruned last month and which has already sprouted some vigorous growth of its own.


My dianthus has also been blooming pretty well, the solid colors more prolifically than the striped ones:
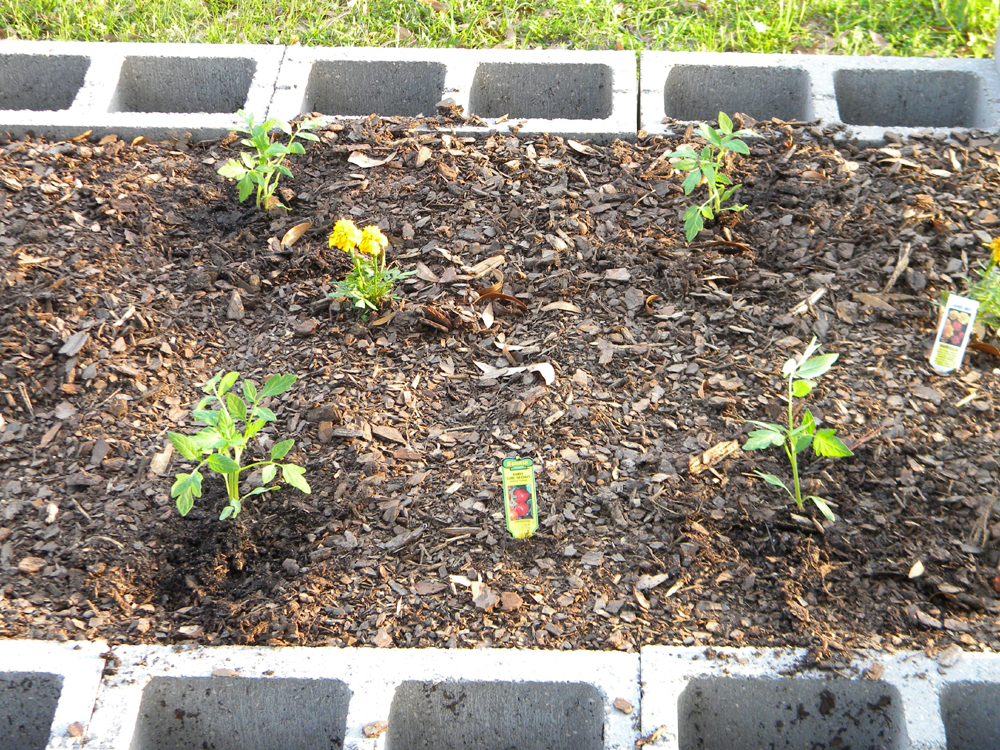
Now, back to the raised bed. It's still sitting there with nothing in it for the time being. I've been waiting until I know the danger of frost is passed to start setting out anything, but I also need to go ahead and start my tomato seeds. I have a packet of yellow pear tomatoes that I wanted to try this year, and of course I'll get plants again from town (maybe even from the Hattiesburg equivalent of a co-op that I discovered on the 42 Bypass) when I'm ready to set them out. My poor raised bed is looking lonely!
And that's pretty much it this time around! I'll leave the blog with three images of my cat, Maverick, checking out the new camellia tree:


Sunday, February 17, 2013

Ah, love working with my garden, and I managed to get some things done this evening that I've been wanting to do! What with it being too dark when I get home from work, or not being able to do some things because of a wound in my leg (for those not in the know, my dog, Max, and I were attacked by 3 dogs in my front yard three weeks ago yesterday. Max fortunately is fine now, after his neck wound healed, but I was bitten on the upper calf of my left leg, and it's taking forever to heal), or because of the weather (one week ago today, an EF-4 tornado ripped through Hattiesburg, so even though I had some time last Sunday, the weather definitely didn't cooperate!), I just haven't had a chance to get around to doing a lot of things I wanted to do. Well, this evening, my usual Sunday plans ended a bit earlier than usual, so I took advantage of that by gathering some tools together, and then dug out part of my raised garden bed, set that soil aside in a plastic tub, then took three 40-pound bags of cow manure and poured them into the trench I'd opened up in the raised bed. Then, I took a garden rake, and mixed it together with the remaining soil in the bed.


Then, I took the soil from the bin and spread it over the top of the newly-mixed manure and soil mixture, smoothing it out after it was put on. Hopefully, this first step will help in getting the fill soil of the bed fertile enough to raise some nice tomatoes, lettuce, and whatever else I decide to include in it. I plan to mix in some other fertilizers in the coming weeks before it's planting time.

It already looks richer and more like growing soil after just stirring it up. For mixing it together, I used the hoe my sister gave to me for my last birthday, my garden rake, and of course the shovel for removing and readding the dirt. I also utilized the wheelbarrow my sister gave to me for my birthday the previous year. Hmm, I seem to rack up on outside tools on my birthdays! ;)

At some point, I want to add the contents of my compost bin, but I'm not sure at what point I should do that! Since I've been adding to it continuously, obviously not everything in it has composted at this point, although I think quite a bit of it has. Here's what it looks like after I stirred it up with my pitchfork this evening:
Also, last year, I had a huge problem with squirrels decimating not only my tomatoes, but my corn as well (I haven't started tilling up the soil for my corn patch yet). This year, I've searched for safe, humane ways to deal with the squirrels, since I couldn't really bring myself (even if I was a good shot) to shoot them, as many people in this area do. I considered live traps, but that would likely be a costly investment (I've no idea how much a live trap costs, but probably more than I'd care to spend). In my research, I've found that a lot of people like using fox urine pellets to chase small critters out of their yards. So, I did a search for some fox urine, and came across something called Shake Away Critter Repellent Granules that I'm hoping will do the job. It contains fox urine, among other ingredients. I've read several reviews on it, and while about 50% of the reviewers claim it doesn't work, the other half says it does work, but that you have to make sure you use it according to directions, and not just scatter it about willy-nilly. So I'm going to make sure I follow the directions to the letter to see if it'll get rid of the squirrels. Several of the positive reviewers also claimed it ridded their yards of moles as well, and that's something I'd really love to see gone, since I have several moles in my yard. I'll keep note of how it works in this blog!
One thing that's definitely needed to do - find a place outside to store it, like in the storage shed. The smell is strong, even through the plastic bottle, and my dog loved sniffing it when I removed it from the box. I made sure to put it up where he can't get to it, as I'm sure he'd love to add his scent to it as well! In the picture, it was in a cupboard (with light bulbs and the like), but the storage shed is definitely the place for it!

On another note, I also finally got around to planting my Amaryllis in a flower pot, so I can keep it inside until after the frosts pass, before planting it outside. It had already started sprouting in the package! Talk about "life finding a way"! I also noticed that the strawberry I grew last year (which was highly disappointing, as it produced mostly small berries, and only 3-4 of them were even worth eating) is growing again, even though it's still winter. Granted, it's not been a cold winter, but we have had our cold days! I'm trying to decide if I'll just let it grow and see if the "second year's growth" produces better berries, or just dig it up and chunk it. I'll most likely just let it grow, though, and see what happens!

Anyway, until next time, happy gardening!


Sunday, January 13, 2013

My, it has been a while since I've updated my blog! The last time I posted, I had created my raised bed garden and dug out my corn plot. Well, sadly, things did not go as well as I anticipated. Squirrels decimated my corn plants before they managed to produce any ears. They were between 1 and 3 feet high when the squirrels in my backyard decided that the plants must be delicious, and they literally tore the plants to shreds. I thought at first a dog, or even a human, had come over and torn the plot apart, but then when I was glancing out of my bedroom window, I noticed squirrels attacking the one or two stalks still standing tall, and at that point, I figured out what had happened. Not sure how I'm going to get around that this summer, because I'm determined I'm going to raise some corn!


As to the raised garden bed, I had set out several varieties of tomatoes, a lettuce plant, and planted carrot seeds. I managed to get a few tomatoes off the vines, but they were small. I definitely need to fertilize that bed much better this year! I have a compost bin that's been, well, composting for nearly a year now, with fresh additions every now and then, so hopefully I'll be able to use that, perhaps along with some commercially-available fertilizers, to get the bed fertile and ready to go! Now, I would actually have gotten a lot more tomatoes off my vines, but those dratted squirrels set their sites on my tomato fruits after the corn stalks, so I lost the rest of the tomatoes too! The lettuce never really did much of anything, and the carrots were tiny and shriveled (another reason for using better fertilizer this year).

So, my first problem is to figure out how to keep the squirrels from destroying my garden! I'm thinking I may look into squirrel traps (live ones) and take the trapped squirrels far, far away to let them loose. As much as I hate the little buggers right now for what they did to my garden, I simply can't kill them. Now, if my dog or cat were to catch some and kill them....well, that's not something I would condemn, lol, but I certainly couldn't bring myself to kill them. And right now, the squirrels are in little to no danger of being caught by my pets, since the cat shows no interest in them, and my dog is always on a leash (especially these days when there is a vicious dog running around the neighborhood). :)


Ferocious-looking, aren't they? (Or maybe that should be "fur-ocious"? LOL) No, I don't think the squirrels are in any danger whatsoever from this dynamic duo! So the topic of squirrel trapping shall be considered and, if deemed appropriate, I'll take those steps to ensure the downfall of the squirrel population in my backyard. Or I may have to consider alternative methods to diminishing the squirrel population, but rest assured, my goal shall be attained!

Now, I also plan to build a chicken coop this year and start raising farm-fresh eggs for myself and friends. I hope to find a design in the following book that I will like, and can afford to build, and get started on it in the early spring:

I don't really need a lot of chickens; I'm thinking 2-4 should be plenty for my needs. Although, once I start eating fresh eggs, I may become addicted to them and include them in more meals! I can remember having fresh eggs as a kid, and I am looking forward to having them again! I also remember enjoying the taste of duck eggs as a kid, although I honestly don't remember exactly HOW they tasted. I just remember we had a duck that laid eggs, and I remember them being delicious! I wouldn't mind adding a duck to my farm to have the occasional fresh duck egg as well.

Other additions I'd like to make to my land this year include completing the inside of the house (I still need to finish renovations on my kitchen, and I need to renovate the living room as well), and I'd like to build a deck and patio outside my back door. I also plan a few more flowerbeds, and I purchased a pink Amaryllis builb today to help enhance my yard. This will be my third spring/summer in my house, and I really want to get my yard looking like I'd like it to look this year. We shall see how it goes!

Well, that's it for now. Hopefully I'll get back to updating this blog on a more regular basis and won't let almost a year pass by between posts again!

Sunday, March 25, 2012

So here are some updates on my farm. The raised garden bed has now been completed. I have filled in the 36 holes to use them as planters, and I have 4 caps on the remaining 8 holes, so they can be used both as seats and as covered storage.


I also had some fireants decide to bed up in the upper left (from this perspective) corner. Tossed some Ortho Fireant Killer on them, it took three times as long to kill them as the bag claimed, but they did finally die (or leave, not sure which lol - when I used Spectrum Fireant Killer, I always found thousands of bodies on and around the mounds, but so far haven't found bodies with Ortho). We had a storm blow through here last week, so I had to move my zinnia peat pot trays that were on my potting table. I'd lost one of the trays just before the storm to some high winds that blew it off and spilled the seedlings into the lawn, but the other 3 are now on my porch, and the seedlings so far are growing:


As to my corn patch, it's looking good too. I have sprouts in the patch - at the point the following pictures were taken, about a quarter of the seeds had sprouted, but as of today, I think almost all of the 45 seeds I planted have sprouted.


The corn patch in its entirety. Definitely not a huge garden spot. :)


A single sprout.


A trio of corn sprouts in triangular formation.


Closeup of a very strong sprout!


A row of three sprouts.

Definitely looking forward to my first ears of Silver Queen sweet corn from this patch! The sprouts, at least at this stage, are growing actively and aggressively; I fully expect them to be a foot high by the beginning of April! Although I've never raised corn before, so reality just may fall short of my expectations!

Saturday, March 17, 2012

Corn Patch, Potting Table, and Raised Bed Garden Update!

A few little changes have been afoot out here at Booth's Little Farm! Among those changes are a new patch for my sweet corn, a potting table, and caps for some of the blocks in my raised bed. Another change that I have yet to photograph is that I finished up the raised bed by filling 36 of the 44 holes in the blocks with earth so that I can use them as planters - and also to add stability to the wall of the bed.

For starters, I dug out an area roughly 12' x 8' (I have yet to measure it to see exactly what the size is lol) for my corn patch. I dug out the sod initially and placed it around the perimeter of the patch so I could work out the soil from the sod later. During the digging, I came across much buried "treasure" - mostly broken glass and the rusted remains of tin cans. At one point, a large Victorian house graced the corner to the south of me (before my house was built), and my friend speculated that they probably threw their trash out in the back yard, far from the house yet within a short walking distance. So my land was most likely their backyard dump! That certainly explains all the trash I've dug up! I collected most of it in a plastic bin for disposal:


The noise a shovel makes when encounter subterranean glass is almost up there with fingernails on a chalkboard! A most unpleasant sound. :) Anyway, I started out with the basics for the patch:


Once I had it roughly the size I wanted, I then set to taking each chunk of sod and painstakingly working the soil out of them and back into the patch.


My tools for working this patch are rather primitive, I suppose. Or, more to the point, the tools aren't so much primitive as just requiring everything to be done by hand:


No tiller, no sod buster, just a generic shovel and garden rake! And, of course, the most basic of all tools: my bare hands. At one point when I was breaking up the sods by hand, the neighbor's daughter-in-law - "once-removed", whatever that means - came over to meet Max (my dog) and was gushing over how pretty he is, then looked at me and said, "You, however...." LOL. I was pretty filthy from head to toe. Took a lot of scrubbing in the shower later to get clean again! But, I've been enjoying living up to my name these days! ("George" means "Farmer". My full name means "The noble farmer who lives by the castle".)

So, once the sods were broken up and the soil ready, I used the handle of my rake to make 5 rows, and dropped 9 sweet corn seeds per row for a total of 45. It may still be too early for corn; I've heard you're not supposed to plant it until after Easter, but I used roughly half of what was in the packet; if this doesn't come up, I can replant in April. So now the patch looks like this:


The sticks, actually roots I dug up while prepping the patch, mark the rows, since when I watered the patch, those rows virtually disappeared. My biggest concern now is the neighborhood dogs walking all over it and scattering the seeds when they do. But, since I finished yesterday, so far only a couple of tracks have been in it, and I smoothed those back over. Hopefully no seeds were scattered about from that one. Who knows what tonight will bring though? I may just have to invest in a short fence to put around it, as well as around the ones I'll be doing shortly for my sugar baby watermelons and my Hale's jumbo cantaloupes!

The caps on the raised bed add a certain flare to the whole thing, as does the filled-in holes made into planters. Unfortunately, I've yet to photograph the bed with the holes filled (just finished that today), but I'll get that image on the blog before too long. For now, here's a picture of the bed with the caps and the 2 solar lights I have burning on each end.


I also added 4 more tomatoes to the bed yesterday; smaller specimens picked up from Home Depot, a variety called "Early Girl". Supposed to start producing fruit 50 days after planting and continue producing until the first frost. We shall see if the 4 early girls live up with their descriptions or not!


In addition, I also built myself a potting table. Talk about primitive! But it's functional and gets the job done lol. I built it by picking up the springs from a baby crib someone down the street had put out by the road. My idea what that a good potting table is made from hardware cloth, fencing, or something of the sort to allow soil to fall through and to allow for air circulation from top to bottom, so why not make a table out of the crib springs? So after dragging it back home, I took the leftover wood from the pallet I had pulled apart to make the compost bin, and used that as the legs. There were 3 long studs in the pallet, roughly 86" long, so I used a circular saw to cut 2 of the pieces in half. Which sort of worked; I actually managed to get the pieces uneven on my first try, so I had to shorten one of the legs, making the 43" legs I'd planned to use as 42.5" (half an inch makes a HUGE difference when trying to balance something like those springs on the legs!). I then, once the legs were a proper length, took the third stud and cut out 3 support beams for the legs. I then had to go buy a stud at Home Depot, because I was one stud too few lol. So, my very primitive potting table ends up looking like this:


Primitive, but functional! It'll do for my needs at this time lol. I'm debating whether to paint it, or just leave it as is (although that purple/pink of the stud I bought it rather nauseating lol). You may also notice there are peat pots already laid out on the potting table. Two are shown; I added two more after these pictures were taken. The peat pots contain some very pretty purple zinnias that I want to put in my flower beds in the front yard. And maybe a few in the back as well.


If these sprout and grow, I plan to go back and get some more flower seeds that I'd like to have. It's one thing to purchase a growing plant from a nursery (which is fine in and of itself), but it's quite another to have 40 flowers you grew from seed yourself!